This bindery tip from the “why didn’t I think of that” category is a clever update on an old-timer trick that will save you lots of time when you need to score a handful of samples, mockups or even short-run digital jobs.

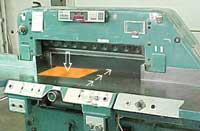
This bindery tip from the “why didn’t I think of that” category is a clever update on an old-timer trick that will save you lots of time when you need to score a handful of samples, mockups or even short-run digital jobs.

The problem of static in the bindery and press room is a complex subject. Prior to the age of digital printing equipment a static problem typically reared its head in the cold, dry winter months. Today, modern copiers and some digital presses are subject to static problems year-round, and the increasing complexity of printing and finishing equipment means there is simply more opportunity for the creation of static charges.
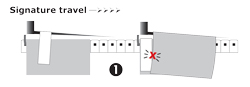
Saddle stitching machines that use a chain upon which folded signatures are dropped can present the operator with signature registration problems for many reasons. Different sized signatures, mechanical issues, a stretched chain or improperly set feeder pockets can prevent the signatures from jogging to the head consistently. Some problems can also cause signatures to ‘de-jog,’ if you will. If there is crossover registration in the stitched book, these mis-registered signatures can ruin the finished product.

Management fads come and go, even in our printing and bindery businesses. Six Sigma. Sensitivity Training. Management by Objective. Core Competency. Management by Consensus. 'Fun' is one of the current fads. Twitter, which prides itself on wackiness, has a team of people whose job is to make people happy. Seriously.
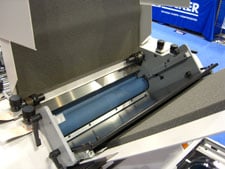
The very nature of the creasing solutions offered here at Technifold means we work with many bindery operators who crease and fold some pretty heavy cover stocks. Popular folding machines were designed to fold text papers, but folder manufacturers and clever bindery equipment operators have managed to make folding of cover stocks fairly commonplace.
The inserter pockets on saddle stitching machines are designed to run a wide range of sizes. Problems can arise when you simultaneously run different sizes, such as a business reply card (BRC) stitched inside an 8.5 x 11” book. Getting the feeder to drop the BRC on the sword is usually simple but the trouble starts as the BRC approaches the next pocket.
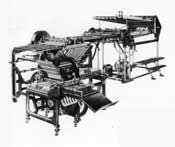
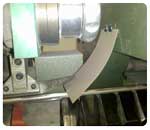
My first experience with folding machines could have taken place in a museum, considering the age of the bindery equipment antiquities used in my training. One was a Dexter-Cleveland (Model M shown at left) and the other was a small pile-fed Baumfolder. The Dexter was as tall as I am and loading paper was a workout that required climbing two steps to reach the infeed. My legs never let me forget a day of up-and-down on that machine. Our bindery mechanic never could figure out exactly how old the folders were but felt they dated back to the 40’s.

Thomas Edison did his best work during the night. Some people today do their best work at night too, mainly because they are interrupted so often during the day. The problem is that most of us were never taught how to fight information overload and constant interruptions. Some folks commonly confuse 'busyness' and lots of activity with productivity, even if much of that activity comes from interruptions. It might even be seen as a badge of honor.
The Problem: Most popular folding machines have two to four fold plates per section, usually 3-4 in the main, “parallel” section and 2-4 in the right angle sections. Some folding jobs require more parallel fold plates than you have available. A typical example—4 parallel “roll” or “barrel” folds (5 panels) where each panel rolls over onto the adjacent panel. If you have a 6-plate machine you can fold up into #1, then down into #2, 4 & 6. What if you don’t have such bindery equipment?
The Solution: Run your right angle folding section in a tandem configuration as shown. Depending on plates available, you can fold this 5-panel job a few ways. Grab a sheet of paper and let's fold...
Method 1: use fold plate 1 & 3 in the parallel and 1 & 3 in the right angle section.
Method 2: Use plates #1 & 2 in the parallel and #2 & 4 in the right angle.
Method 3: Use #1, 2 & 4 in the parallel and #2 OR 4 in the right angle.
For a 6-panel job, use method 3 plus open one more fold plate in the right angle. So it all sounds easy on paper, right? In my experience, and judging by the number of questions we get from our readers on this topic, easy is the exception. Here are some tips which when explained will shed light on some of the problems that arise.
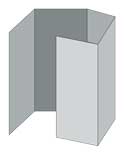
Tip 1: Do as many of the folds as possible in the tandem right angle section. An operator new to this type of fold will probably want to do most of the folds in the main parallel section—it just feels like there is a bit more control—but this actually results in an oblong piece that is difficult to register on the right angle. (shown in photo at right) An oblong piece has a tendency to rotate and is hard to stabilize, especially with its uneven weight distribution (3-4 sheets at the front, 1 at the tail.) Fewer folds in the first section provides you with a longer piece that’s easier to stabilize (photo above left.)
Fewer folds also means you have a thinner piece entering fold roller #1 in the right angle, with less tendency to skew. The bulkier or spongier the lead edge, the harder it will be to force in to fold roller 1. Using extra hold-downs to flatten the piece will help. I’ve also used streamers of paper attached to the parallel section to help stabilize troublesome pieces as they hit the right angle.
Which brings us to Tip #2: Elevate the right angle section so the sheet can enter the side guide partially underneath the marble holder. One reader who does a large volume of such work claims to have much better results using the 16pp right angle instead of the 8pp section. I suspect the early entry into the side guide is a big help, no matter which section is used. The side guide on the 16pp section is also on the same side as the guide on the parallel section, which may have some bearing on the results. (see tip #6 below)