Saddle stitching machines that use a chain upon which folded signatures are dropped can present the operator with signature registration problems for many reasons. Different sized signatures, mechanical issues, a stretched chain or improperly set feeder pockets can prevent the signatures from jogging to the head consistently. Some problems can also cause signatures to ‘de-jog,’ if you will. If there is crossover registration in the stitched book, these mis-registered signatures can ruin the finished product.
Saddle stitchers are so complex that there are too many scenarios to address in one short article, so we’ll break it down into a series of tips over the coming weeks. One piece of advice for operators of any type of bindery equipment: always check the basic setup items. If, for instance, the pocket timing isn’t set correctly, you will struggle with register and machine jams no matter what sort of tricks you use. Sure, sometimes you have to break the setup “rules” for a stitcher. An operator can’t however, make any troubleshooting progress if he hasn’t at least tried it first according to the manufacturer’s recommendations.
Most registration fixes center around the action taking place at the swords. Here the signature is opened and dropped, to wait being swept along by a pin that protrudes from the chain running just underneath the sword. In order to remain in register, the signature must stay firmly planted against the pin until the book is stitched. Here are 5 tips to help make that happen when the basics fall short.
1) Use jogger springs or brushes with every pocket. Machines usually come equipped with one or the other or both. Often these get thrown in the parts drawer when they fail to work on a particular job. Some newer machines don’t even have them but they can be added with simple homemade rigging.
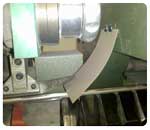
 Generally the jogger springs work better than brushes, but both should be tried. (Brushes work well just prior to stitching, but that’s for another article.) The springs usually have a V-shape slot that rides over the signature and can scratch a coated sheet if not carefully set. That’s one occasion when they get removed. In those cases, you can tape up the spring to eliminate the scratching. Alternatively, use one or more pieces of chipboard in place of the springs. Change grain direction for more or less tension, and add extra pieces of chipboard to increase tension further. This also works well just after cover feeders. (shown in photo at right.)
Too much drag with the springs will cause the signature to pop forward. The good news is you can bend and shape the spring as needed. Need more pressure? Double up on the spring or add a piece of steel strapping or similar material.
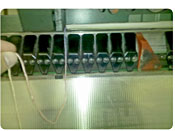
 2) String. This is by far the most popular outside-the-box technique judging by reader feedback. Attach a piece of tying string or yarn to the bracket that holds the sword. Cut it long enough so it just reaches the next sword (or just past the start of it.) Some operators tape it to the sword itself. The drag from the string will keep the signature pushed against the pin as it falls from the sword and travels on the chain. Feel free to experiment with attach points and with the type of string.
3) Add friction to the sword itself. This simple technique is nearly as popular as the string tip. Apply masking tape or grip tape (such as used on tennis rackets or golf clubs) directly to the sword itself. Experiment with placement and size of tape for best results. Or apply cut strips of press blanket, green belting or similar material to the sword using a double sided tape. Really any slightly rough material can be cut up and applied to give you that extra bit of drag needed to hold the signature firm against the pin.
Another variation: use tape plus string. This ensures the extra drag is applied non-stop until the next signature drops.
4) Use air from underneath the signature to blow it back against the pin. It’s a little trickier than tape and string and not all machines have air available. A side note on air—be sure that a rogue air blast isn’t causing your signatures to mis-register.
5) Check for static. If the register problem increases during the dry winter season, check that static isn’t one of the gremlins. A few readers mentioned that grounding the machine frame can help as does static prevention with proper humidity levels.
Remember, machines, paper stocks and the materials we mentioned vary quite a bit so a little experimentation will probably be necessary. We have more saddle stitcher registration tips to share with you in the coming weeks, including ideas on the stitcher chain and pins, calipers, brushes and more. Stay tuned and feel free to share below.
(photos courtesy Larry Holona, Bindery Supervisor for Graphics West.)

