In a recent Bindery Success Blog article we talked about the importance of folding dummies. One reader asked us if there were any generally accepted practices for marking a folding dummy properly. As with most print finishing processes, there isn’t a single, universally accepted practice. Even so, there are a few proven techniques I’ve seen in practice which will prevent trouble in the bindery.
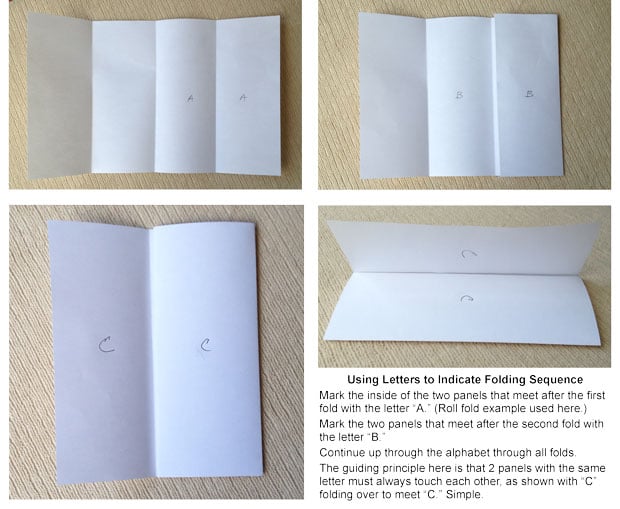
Our first method is, in my opinion, the clearest and easiest to use across a wide range of fold styles. You simply use letters to indicate which panels meet within a fold. For example, we have a 4-panel roll fold in the photos below. The first fold is marked with “A” on the two panels that meet. The second fold is “B”, and the final fold is “C.” If the brochure is re-folded the wrong way, one or more of the letters will not meet. “A” must always touch “A”, “B” touches “B”, etc. Start with letter A for the first fold and go up through the alphabet for each subsequent fold.
Trish Witkowski of foldfactory.com has a comprehensive catalog of fold styles and this is the technique she uses to indicate proper folding order in her book FOLD: The Professionals Guide to Folding. It’s simple, fairly foolproof, and it works across all styles of folds from basic through complicated, exotic folds.
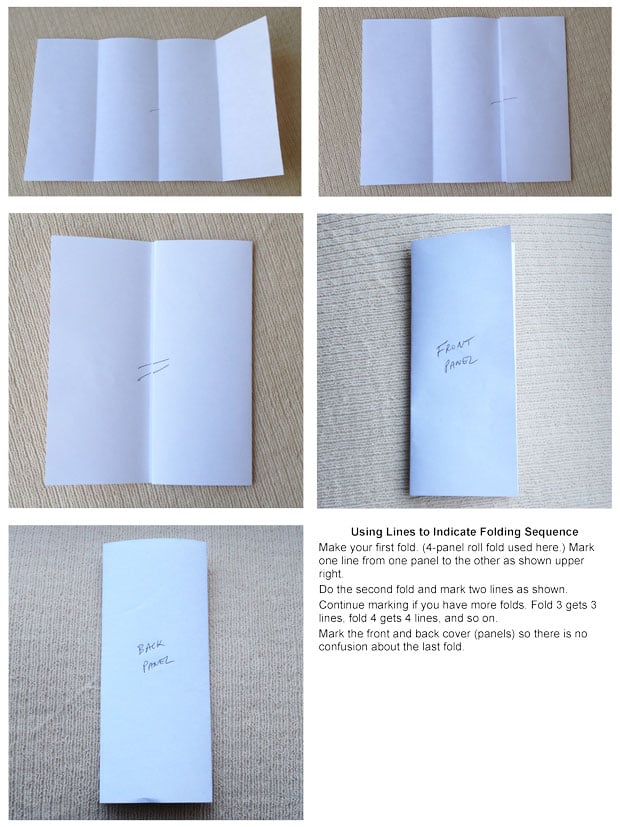
The second method involves the use of lines. To do this, make your first fold, then mark one line from one panel to the next, on the inside of the fold as shown. Make your second fold and mark two lines. Continue until all folds are marked. To make sure the last fold isn’t backwards, you can mark the front panel and back panel as such.
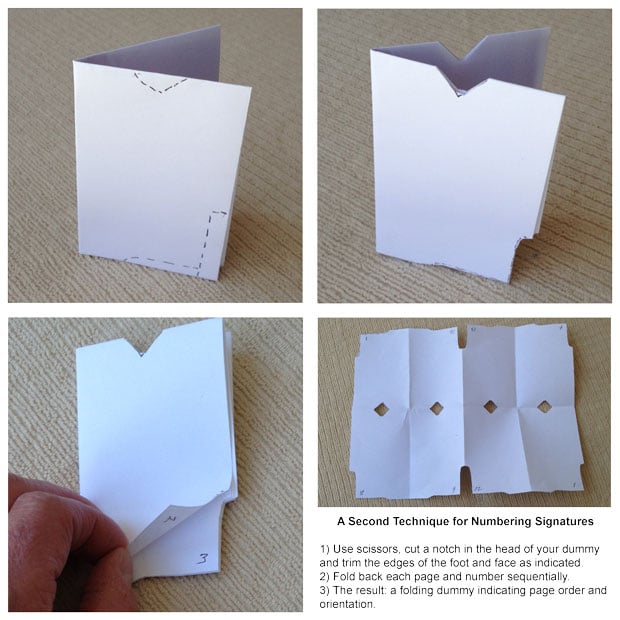
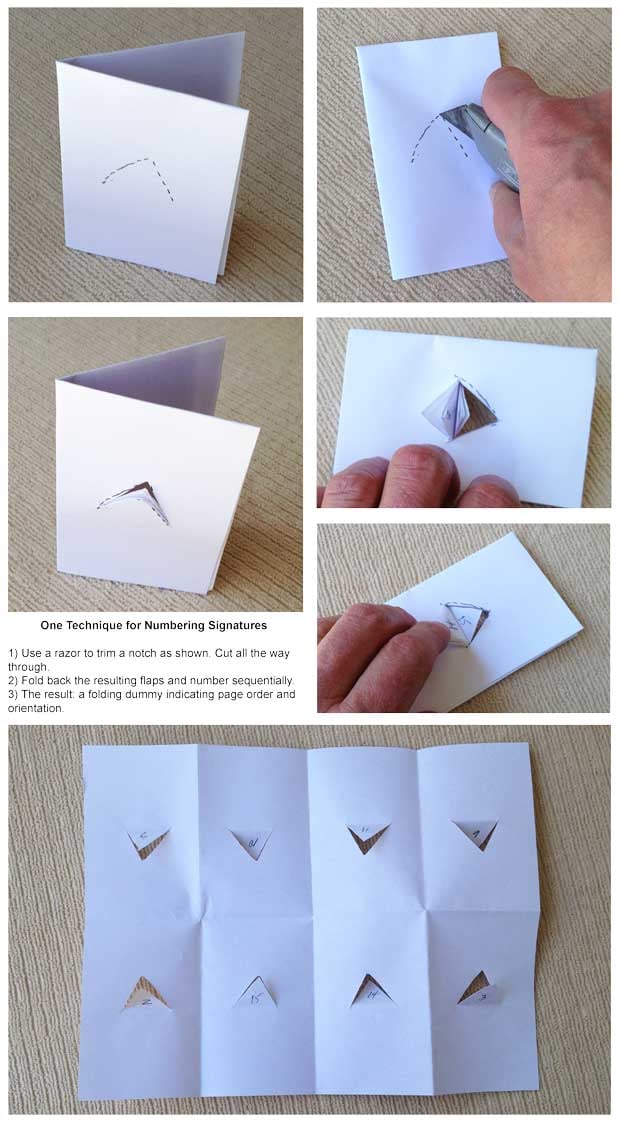
The third method is primarily used for signature work. Whenever you’re folding a signature, the page numbers will be your guide since there is only one way to fold it to get the results you need. Yet when you’re planning by setting up your signature dummy it can be cumbersome to number the pages. Here are a couple of old-school tricks to make it fast and easy.
Notch the head and trim the foot and the face as shown. This makes it easy to fold back the corners to quickly number every page. The notch at the head indicates where the head is to ensure proper layout direction. This technique is from the Lithographer’s Manual of old.
A variation on that technique is to notch the center as shown. You can then fold back each flap and number the pages without opening up the dummy. The triangle shape also points to the head.
One important thing about finishing is to start your project by talking to the finisher first, from day one of the planning stages. Follow their suggestions for marking up your dummies. In fact most of them will help you through this if you’re not familiar with how it’s done. Then be sure to communicate with them about all changes that take place, and you won’t go wrong.
Despite all the prep and design software available to us, a physically folded and marked sample can still be the last defense against catastrophic print finishing mistakes. If you have another technique you’d like to share, please let us know below or use the Contact Us form.


