
In the process of folding paper we encounter ‘pushout’. As one sheet is folded inside another, the inside sheets naturally have a tendency to push out (or creep out) away from the spine by the thickness of the paper for each subsequent fold. Ideally this is all compensated for in the design stage where printed images on the inside pages or panels are shingled further inward toward the spine as they near the 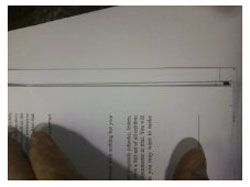 center of the stitched book (or folded piece,) and outer pages are moved away towards the face.
Yet even with the best planning and preparation, folding a 16 page right-angle signature introduces another variable that can be tough to fix. In the right angle final fold, the top of the signature is somewhat anchored so pushout is minimized. The bottom of the signature however, is loose and thus free to push out further than the top during folding. (shown in photo)
This isn’t very noticeable when folding light stocks, but can be problematic as you fold heavier stocks in this 16 page format. If the print design has a border or design elements close to the trim, the page will appear to have crooked trim even though the book is folding and trimming properly.
One workaround is of course to reduce the page count in each signature. If for instance you run a 16pp book entirely as 4 pp signatures instead of one 16pp signature, you won’t have the problem of angled pushout as shown in the photo. Pushout will still happen but it will be square and is much easier to compensate for in the design stage.
If you are involved in the design and prep work, always check with your bindery first to discuss such a job. However most of us in the bindery know that the first time we usually hear about such a job is when it shows up on our doorstep, so we just have to deal with it!
Here’s a simple tip to help minimize this folding problem submitted by Bindery Success reader Todd Summers of Nittany Valley Offset. First, be sure your basic folding machine set up is perfect. (A crooked perf looks similar to the pushout photo above. Don't confuse the two issues.) In this case we are folding in half and perfing the head in the parallel section, then folding 1x on the perf in the 8pp section, then doing the final fold in the 16pp section. A score may be needed for the final fold if the stock is very bulky.
Once you are satisfied that the setup is correct, add 1 extra sheet of paper to the 16pp section fold roller calipers 1, 2, 3 and 4 on the perf side (operator side) only. For instance, the fold roller 1 caliper will have 5 sheets on the perf side and 4 sheets on the far side.
According to Summers this will reduce the pushout effect and works nicely whether you are running up or down folds in the 16pp section. It won’t eliminate the problem entirely but it will minimize the effect, and it only takes moments to set up.