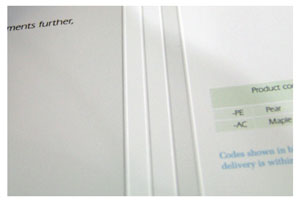
 One frequently asked bindery question we get is “How can I produce multiple scores, very close together, on my folding machine?” These scores might be for a few different purposes such as perfect bound book covers, product cases and wraps, tray inserts, table tents, raffle ticket booklets, or other specialty folded items.
As you or your folder operator might have already discovered, there are limitations on how closely scoring or creasing tools can be spaced. However, if you need to overcome these limits, you have a few options you might not have thought about.
- Add pre-slitter shafts to your folder. These shafts are located just prior to the first fold roller. The combination of two sets of shafts, before and after the fold rollers, allows you to score, perf, or cut with fewer limitations. Although this option is usually ordered when the machine is made, there are retro-fit kits available on certain types of folders such as Stahl, MBO and Baumfolder. Check with your dealer. If you’re doing enough complex finishing work on your folder, it’s a great feature to have.
Run a right angle section in line with the main, parallel section. (diagram at right) Close off all the fold plates (deflectors down) and position scores or creases on both sets of slitter shafts. You get the same net effect as having pre-slitter shafts although you have the extra complication of having to register the sheet twice, once in each folding section.
- Run the piece through the folder two or more times, as needed. For a short run, this is a quick fix. Be sure to carefully monitor the folder’s register. After the first pass through the machine you might have a bit of curl one way or the other which can affect how well it registers. (See a related article here on reducing curl.) You don’t want the first pass to register perfectly while the second pass bounces all over the place.
- Use a specialty tool such as Technifold’s Spine-Hinge Creaser to create up to four creases simultaneously.
You can put this on conventional folding machines without the need for pre-slitters, and you get up to four closely spaced creases in one pass. Of course if you already have pre-slitters, then this gives you even more creasing and finishing flexibility.
Spacing between creases is adjustable as shown in the video. Spine width when running four creases is infinitely variable with a minimum of 5mm, or just under ¼”. Hinge width varies from 4mm to 17mm (5/8” plus).
All four creases can be positioned on the same side of the sheet or you can run two on one side and two on the other. Three different male rib profiles combined with four female channels provides a lot of flexibility to crease a wide range of paper.
Although this creasing tool was originally designed to produce creases for perfect bound book covers, we’ve found users applying it in numerous other product applications, as mentioned above. Since many of these require only two creases, and due to popular demand, we’ve decided to offer a 2-Crease version of the Spine-Hinge Creaser.
In short, the 2-Crease version will do either one or two creases. The minimum crease to crease distance is 4mm (just under ¼”) and the maximum is 17mm (just over 5/8”).
Both versions are available to fit MBO 30 & 35mm, and Stahl 35mm shafts. We have a slightly different version to fit the Stahl 25mm shafts.
Click the video below to see how the Spine-Hinge creaser is set up and run on an MBO folding machine. If you’d like more details and current pricing, please use the Contact Us page to send an email or call the sales office number at the top of the page.
Check back soon for a new product spec sheet on the Spine-Hinge Creaser. Or use the Contact Us Form to email us and we'll send it to you as soon as its ready, probably early the week of Aug. 18th.

