
 As you increase the speed on a saddle stitcher (or any piece of bindery equipment,) you're likely to see more and more defects as the speed increases. I often quote Kevin Carey from his ABC’s of Diecutting, “Increasing speed exposes weaknesses in methods, in practices, in tools, in technology, in organization, and in knowledge, skill and experience.”
There are many components that make up an automatic inserting, stitching and trimming line, each designed with operating specifications and limits. If any single component is slightly worn or not set correctly it will prevent the machine from running at its maximum designed speed. Lots of little defects and weaknesses can add up to big losses in productivity.
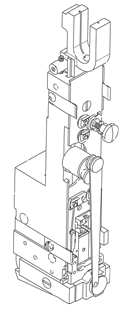
The stitching head is one especially critical area for proper operation of your saddle stitcher at any speed. Even the simplest of newer stitching heads is a complex piece of equipment which if not properly handled, will cause slow downs, poor quality stitched books and machine down time.
I was recently talking with Dave Double of Double Equipment, who specializes in bindery equipment repairs, including servicing of stitcher heads. His service call and stitcher head repair experiences bring to light seven common but costly mistakes that stitcher operators and bindery managers make with their stitcher heads.
1) Using the wrong lubricant. Hohner and Muller heads, for instance, use a one-way bearing in their wire-advance system. Operators often use the wrong grease which at higher speeds results in varying leg lengths in the stitch. This leads to a frustrating troubleshooting expedition where the operator is trying to ‘fix’ a head that simply requires the correct grease.
Also, stitcher manufacturers usually recommend light machine oil and not the automotive oil which is often used. Be sure to use precisely what is recommended.
2) Using the wrong amount of lubricant. I think any stitcher operator who’s been around a while has made this mistake. You put too much oil somewhere on the stitcher head and the next few thousand books are a nightmare! Excess oil makes its way through the head and through the rest of the machine. In extreme cases the only solution is to remove the head for disassembly, cleaning and proper oiling.
All that’s typically required is ONE drop at the proper location and at the proper interval. If it says one drop per 8 hours of running, make sure that it’s not two.
3) Using the wrong wire gauge for the job at hand. Two of the most commonly used wires are 24 and 25 gauge round stitching wire. They are good all-around wires for most commercial bookbinding and print finishing applications. But if you’re stitching a 3/16” thick book, or slightly heavier, the 25 gauge is approaching its limit. Problems can arise when you’re near the limit and running at high speed. If you go beyond the thickness limit, you’re almost certain to encounter new problems.
If you’re stitching an extra heavy or extra thin job, be sure you’re using the best size wire for the job at hand. No, it’s not common to saddle stitch books beyond 1/4” thick, but if you do and you run in to problems, don’t forget to check wire gauge.
4) Using the wrong wire gauge for the stitcher head. Each stitcher head has its own suggested limits on wire gauge. A Deluxe 26D is limited to 21-28 gauge round and 21x25 flat. An 18D will handle 20-28 gauge round and several flat sizes. A Muller head such as a DB45 is designed for 25-28 gauge round.
5) Using cheap wire. Wire quality varies considerably among manufacturers. Some factors that affect stitching wire performance are tensile strength, consistency of wire size, cleanliness, resistance to flaking, type of coating, and type of alloy. Cheaper wire means something had to give in the manufacturing process.
For instance, a cheap galvanized wire may start to flake and/or leave excess wire shavings when being cut inside the stitcher head. This in turn will clog the head and cause premature wear on numerous internal parts. It can also make it difficult to get a properly formed stitch at higher speeds. Cheap wire may not be consistently the same size; that 24 gauge might be a 25 at some points. This will change performance.
Generally speaking a tinned wire or a premium galvanized wire will run better, with less flaking, dust and dirt and a more consistent coating, cleanliness and strength. If you do enough stitching you’ll want to consider the larger 70# spools equipped with a de-reeler. These are not wound as tight as the smaller spools so you get less variation due to changes in the wire curl. On the conventional stitcher heads such as the 26D and 18D you’ll find yourself making far fewer adjustments, which in turn helps stitcher productivity.
As our regular readers know, we believe personally and professionally that “you get what you pay for!” This is one more case where going cheap can be very expensive.
6) Lack of regular service. Stitcher heads need regular maintenance, lubrication and service. If you don’t have someone on staff who is qualified to rebuild and repair your stitcher heads, send them out regularly to someone who can. It is money well spent that will keep your stitcher running.
7) Instruction manuals that never get opened. Each model has its own special requirements and peculiarities. It’s been said you can learn either through wisdom or suffering. My vote is for a little wisdom gleaned from reading the manual. It’s less painful.
One time I transitioned to a different saddle stitcher and needed to install a brand new stitcher head. Without reading anything (I just ‘knew’ how to do it) I fired up the machine and heard a sickening metallic “BAM!” One new head, not a stitch to be had…out for several hundred dollars worth of repairs.
So no matter which stitcher head you’re using, you want to be sure it’s set correctly to give a good cut, consistent wire draw, equal leg lengths, proper clincher and clincher alignment, and correct compression.
I think most bindery equipment operators like to have a performance edge available to them when they need it, especially if we want to go home early! Although running at maximum speed is not always the best way to get maximum yield, it sometimes is both possible and necessary. (You can read a related article here.)
So on those occasions when you must run at maximum speed, it’s nice to be able to do it without gremlins like those mentioned above slowing you down. The good news is that these stitcher head tips are simple to follow.
We welcome your stories, comments and suggestions below!
If you found this helpful, please feel free to forward and share with your colleagues.