If you’re a saddle stitcher operator or bindery supervisor, here’s a tip that might stop you from bad-mouthing those graphic designers who love to create step books. Step books get their name from the obvious 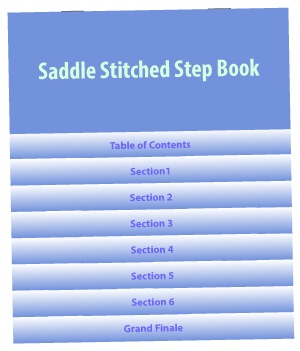 step-like appearance as shown in the drawing at right. When complete, they’re eye-catching, clever, and useful. You can instantly see the contents of a booklet and turn to the section you need.
However, there are a few problems that can arise in the bindery. Our friends Karl Houser, Steve Spanburg, and the bindery crew of BRD Printing in Lansing, MI, recently raised the topic when they ran into a problem. In just a minute we’ll show you how they managed to fabricate a simple solution to help them run this job without having to do any tedious hand feeding during the final saddle stitching run.
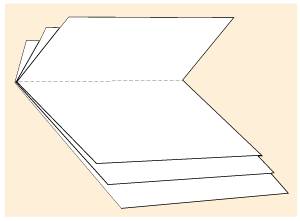
Let’s take a look at the reason for production problems. To create the step effect, asymmetrical 4-page signatures are used. [diagram lower right] Thus, a book with relatively few pages can have many signatures to work with. Also every panel is a different size, so the lip on each is different. In the example sent to us by the BRD crew, the 36 page book is comprised of 9 4-page sigs of 60# uncoated offset plus an 80# uncoated cover.
 All ten signatures have to be run on their Muller Minuteman which only has 4-pockets and a cover feeder. That means multiple passes through the machine.
Next, you have to be sure that the cutting and folding on every signature is perfect. The smallest variation in cutting or folding will show up when the book is assembled.
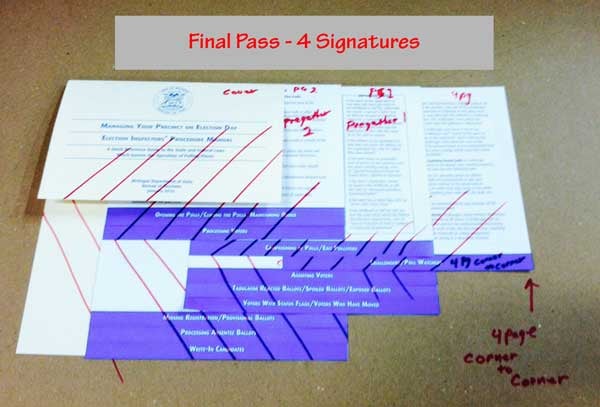
Another small problem is that this type of cover feeder often has tiny variations in register. With normal jobs it doesn’t matter but with a step book, it’s noticeable. Thus the cover was scored and folded off-line for 100% accurate registration. In turn this means the cover has to be run in one of the pockets and not on the cover feeder.
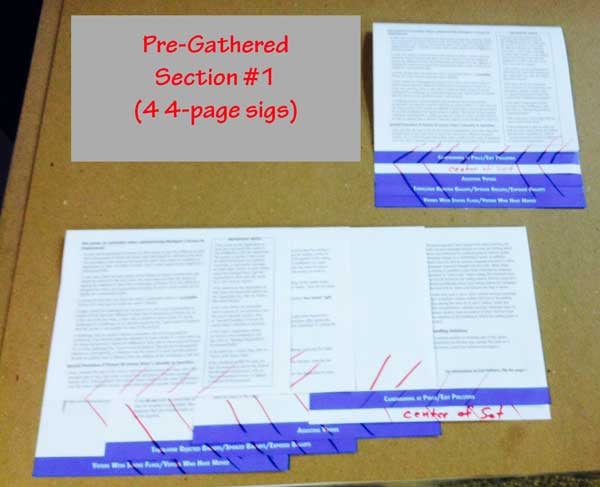
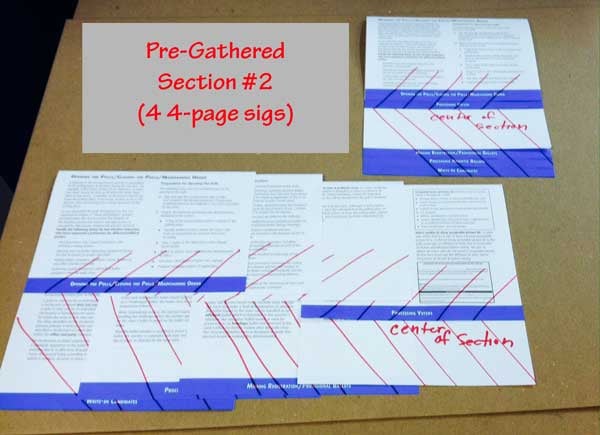
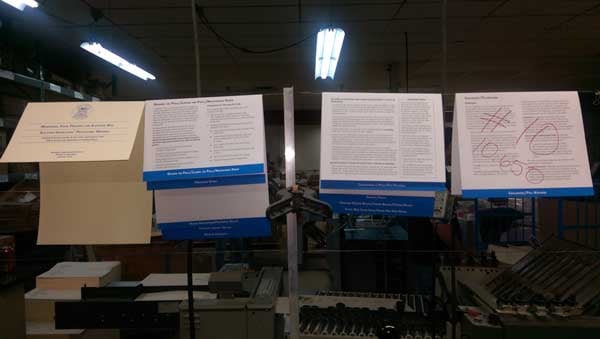
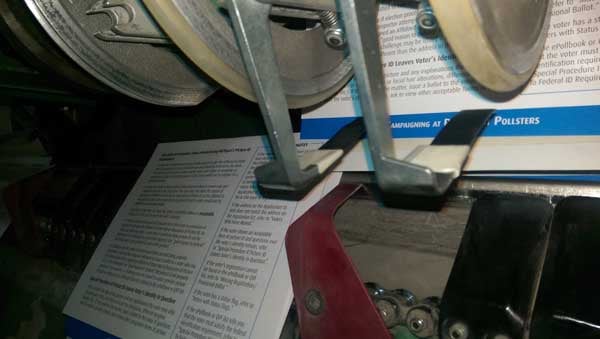
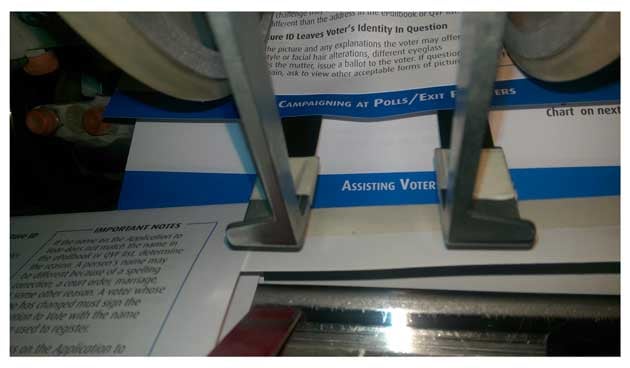
They set up the final pass to run as follows and as shown in the photos below:
 The 2 pre-gathered sections were stitched automatically. The problem with the final pass was how to run both pre-gathered sections automatically. One pre-gather could be run automatically but the second one was a problem. So when they stitched their initial order for 5,000 books, the last pass was fed by hand. That’s tedious, but not overwhelming. When the happy customer ordered 12,000 on the reprint, the BRD team donned their serious thinking caps to eliminate the hand-fed step.
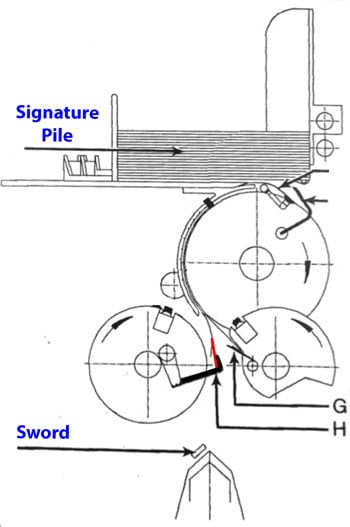
If you look at the pre-gathered sections (see photos below and feeder diagram at right) you can see why it would be difficult or even impossible to feed using automatic pockets. The pocket gripper fingers aren’t long enough to trap the stepped pages so that it opens to the center. Karl reached out to us here at Technifold, to Muller, and to a local equipment dealer to see if anyone had any tricks up their sleeve. No one did. It seemed that hand-work was inevitable.
But that didn’t stop the BRD crew. They began experimenting with the pockets. First they tried longer fingers at “G” (above diagram.) That didn’t work. Then they fabricated a D-shaped finger to see if that would split the pre-gathered section in the middle and keep it open. It didn’t. Finally, they fabricated longer fingers at point H (shown in red in the diagram and at right in the photo.) Now they were onto something!
Using plastic pallet strapping, they snipped a length that seemed right for the signature. The plastic was taped to the finger H. It’s important to note that they used plastic and tape to avoid any possible damage to the machine should one of the extensions fall off. After some fine adjustment to the fingers, they next 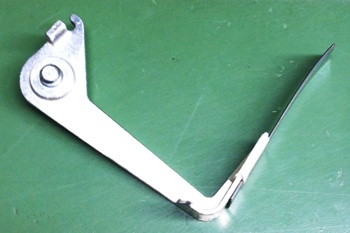 adjusted the sword.
Once the pre-gathered sig opens, it has to remain open to the center so that none of the other stepped pages catch the chain as it’s dropping on the sword (drawing below.) To do this they did two things:
1) They taped a piece of 100# cover to the sword, adjusting the size of the cover paper so it kept the sig open.
2) Next they re-positioned the sword. The right combination of these two items allowed the sig to open and drop consistently. It sounds easy but Karl says it took some work.
Of the two pre-gathered sections, only #1 needed the custom fingers. Number 2 was run using the pocket as-is, along with sword modification and re-positioning.
Yet in true Murphy’s Law fashion, the center 4-page sig, usually a simple job with vacuum, gave them more trouble than the pre-gathered section.
The net result? Three passes on the Muller stitcher, all done automatically. No tedious and expensive hand feeding was required. The photos and video below should give you a good idea of how it all came together.

Feel free to share your step book stories or suggestions below!


