
 Drilling holes in paper can be easy and trouble-free…if you practice the right habits. The drilling concept is simple but like most things in bindery and print finishing, there are more factors to consider than initially meet the eye. These include type of paper stock, size of hole, number of holes, type of drill bit and coating, drilling blocks, drill bit depth adjustment, table speed and lubrication.
It’s easy to buy a new piece of bindery equipment for drilling, set it up and start running. If you skimp on the details, you’ll soon find yourself plagued by broken or clogged drill bits, ruined lifts of paper and even damage to expensive drill head spindles.
With the 7 simple bindery tips outlined below, you’ll eliminate these problems, get extended drill bit life and have a smooth, nearly non-stop drilling workflow. And in the bindery, non-stop is the key to maximum yield.
1 - Drill bit depth adjustment and seating. The drill bit should just barely cut into the wooden drilling block. Start by firmly seating the drill in the spindle and adjust so the drill bit isn’t quite cutting into the drill block. Gradually adjust so the drill cuts through a single sheet of paper. Drill a small lift of waste paper to further seat the drill. If it’s not cutting through the lift, make gradual adjustments until it cuts cleanly through—resisting the temptation to go deep into the wood—doing so prematurely dull the bit! Repeat for ALL drill bits.
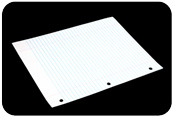
2 - Use chipboard or other waste material on the bottom if you desire a perfectly clean cut on the bottom sheet of the live job. If you can do this, you’ll rarely have to make further adjustments to the bit depth because the bottom sheet will be discarded anyway.
3 - Be sure drills are sharpened before every job. With the right tools, sharpening is very fast and a shortcut in sharpening is guaranteed to cost you far more in lost production time, replacement bits and premature wear on the machine. For long run jobs you may need to sharpen 2 or 3 times in a day, but it is well worth the effort. For me, a change in the sound of the drills going through paper was one clue to sharpen. Another clue: one or all of the bits start to clog.
4 - Use drill lube continuously on both the outside of the bit and on the sharpened edge of the bit. It reduces friction and keeps the waste chips flowing freely.
5 - Use the fastest possible table speed. When I first worked with drills, I mistakenly assumed that slower was better. But drill bits spinning through paper generate an enormous amount of heat and mechanical resistance, two enemies which can damage or destroy the bits, drill heads, drive belts and motors. You want the drill bit in and out as fast as practical. The right speed varies with each job and it takes some experience to get a feel for it. You may, for instance, adjust the speed to get a certain sound for one job and a different sound for another, with each ‘correct’ sound verifying you have the correct speed.
6 - Clean out all drill bits as soon as you are finished with a job. Drill chips that move freely through a hot bit will probably clog up as the metal cools and shrinks. Then next time you drill, the waste chips are solid as a rock inside the bit and you instantly break it, or you stall the table, or you jam the bit so hard inside the spindle it’s nearly impossible to remove. Trust the voice of experience on this one—I’ve done them all! So clean them every time and give a light coating of lube to protect the metal. While you're at it, clean the drill spindles too. This ensures proper seating of the bits.
7 - Visually inspect the drill bits before each job. Drill bits can flare out at the edge or get nicked, chipped or cracked. If damage is visible, it’s time to replace.
Drill operators usually tend to one or more of these tasks when it suits them or when a problem arises. Instead, make it standard operating procedure or even better, use a checklist. Be sure to follow your manufacturer’s recommendations too. When combined with the hard-earned lessons above, you’ll see a noticeable improvement in your drilling workflow.