
 Fold plate indicators don’t always tell us the truth. Set one at any given length and then fold a sheet. You might get the dimension you want on the first sheet if you’re experienced on that folder. More likely you’ll have to adjust it once or twice.
This little quirk of folding machines isn’t significant when you’re folding simple parallel fold jobs. You just make an adjustment or two and you’re usually ready to run. But when you are folding signatures with perforations, or brochures with very heavy scores or creases, it can lead an inexperienced operator astray during troubleshooting efforts.
Perforations can roll over or fold crookedly, contributing to cross-over (line-up) problems in signatures. You might encounter intermittent dog ears, fiber cracking, wrinkling, or paper jams. In response to such scenarios I’ve seen many operators adjust fold roller pressures, skew the fold plate stop, or skew the side lay, only to find each adjustment worsens the problem.
There are two things you can do. One is to correct a faulty indicator so that when you set it, for instance, at 5”, it actually folds at 5”. In the spirit of lean manufacturing, this will reduce all future makeready times. It’s an excellent down-time project that will pay you back for a long time.
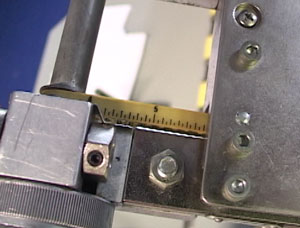
Yet even if the indicator is correct, it’s a good idea to confirm that your fold position is actually in the same position as your perf or score. Why? Because the actual setting of a fold plate stop can be up to ¼” or more away from the actual perf or score position. This discrepancy might not even be noticed and everything folds uneventfully. In the video below we demonstrate how far off you can be and still get a reasonably good fold.
However, the most likely result of having such a discrepancy will be the intermittent problems mentioned above. The operator thinks the folder is set correctly. After all, nearly all the sheets are folding on the score or perf, so the problem must be elsewhere. And that’s when the trouble begins.
Todd Summers , a foreman with Nittany Valley Offset and a regular contributor to the Bindery Success Blog, teaches new folder operators to “rough in” the folds associated with a perf or score. For example, when folding a 16-page right angle signature with a perfed head, most operators simultaneously set up the first fold and the perf at the head. Then they move to the right angle folds.
Instead, Summers recommends leaving the perf disengaged by simply moving the counter knife or perf blade out of the way. Then set the second fold, with no perf, as accurately as possible. This won’t be a perfect fold since we’re dealing with two sheets, but it will ensure that your indicated fold size is indeed correct. Once in position, engage your perforator, check its position, and then fold it.
The same holds true for running a right angle letter fold brochure with one fold in half and then two folds in the right angle to a letter fold style. Or for creasing in the parallel section and folding in the right angle. Leave the scores disengaged and rough in your right angle folds. Only then add the scores.
If you are doing more intricate multi-panel right angle folds, or if you are folding very heavy text paper or cover stocks, you can refine this technique for more precision than you get with a “roughing in” technique. We covered that here in a related article on accordion folding.
Summer’s fast and easy roughing-in technique will prevent a lot of headaches when you’re folding signatures or simple right angle scoring and folding work.
Just a side note for those of you working in a Lean manufacturing environment: I recognize that any little quirk that wastes time or material IS significant. The goal should be a zero-sheet make-ready, but that’s a topic for another article…or two. The point today is that we don’t want to be duped by what we think the folding machine is telling us.
Click the video below to see a quick demo.
If you like the article and video, use the social buttons at left or above to share with your colleagues. And we always welcome your comments, stories and suggestions below!